The American Smile Tooth Replacement Kit allows anyone to quickly and easily create a temporary tooth to replace one or several gaps in your mouth.
✔️ Trusted by Dentists Worldwide
✔️ Free Shipping from the USA
✔️ Simple and Easy Process


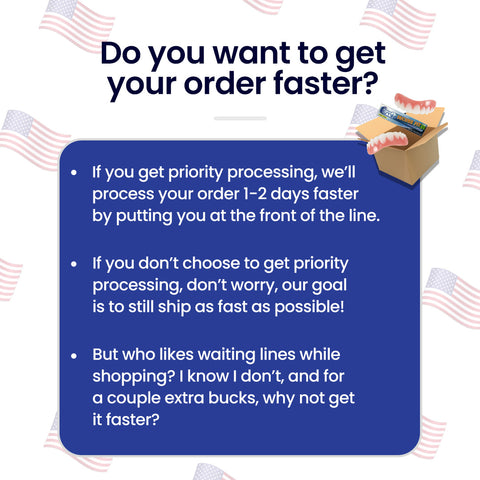
3 to 5 days! All units are shipped from our facility in Central Illinois via USPS.
We also provide a 1-day shipping option for an additional fee.
You may be able to eat with a Temporary Tooth in place, however the product is primarily intended for cosmetic uses.
Eating and drinking soft foods should not be an issue.
Of course! We have thousands of satisfied customers around the globe. We can't wait to bring a smile to your face.
1. Select the Best Shade of Temporary Tooth
The Pro Series Temporary Tooth kit comes with 5 strips of teeth, there are 5 shades total. Choose the shade that most closely matches your natural tooth shade. In front of a mirror, hold the row of teeth next to your real teeth and find the tooth that will best fill the space of your missing tooth.
2. Cut Out Your New Tooth
Once you have selected the best tooth, cut the selected tooth with a pair of scissors. Once removed from the strip, you can file and trim the tooth to the desired shape and size to fit in the space of your missing tooth.
3. Heat the Fitting Material
Heat a cup of water until it is boiling, the water will need to be very hot. Take about 10-15 white fitting beads (approx 1/3 of the bag) and drop them into the water. After about a minute, the beads should turn clear. Once the beads are clear, scoop them out of the water with a metal spoon. The working time of the fitting material is about 2 minutes.
4. Apply the Fitting Material to the Tooth
Take the clear fitting beads and roll them into the shape of a ball. Apply the softened fitting material onto the back side of the plastic tooth (make sure the back of the tooth is dry). The beads should stick to the plastic. If they do not stick, you may need to the heat the fitting material again. Try to keep the fitting material from getting on the front side of the tooth. Scrape any soft fitting material off the front of the tooth with your fingernail.
5. Fit the Tooth
While the fitting material is clear and soft, insert the tooth into the space of your missing tooth. Hold the tooth in the correct position. Once the tooth is in the correct position, gently squeeze on the tooth so that the fitting material is pressed behind your surrounding teeth. With your thumb, press the softened material up and around the back sides of your adjacent teeth until it stays in place on its own. (If you are new to the fitting process, it may take a few tires until you are comfortable with the fit.)
6. Let them Cool
Once the fitting material is spread behind your natural teeth and it feels like you have a secure fit, let the tooth cool in place. It should only take a few minutes to cool and harden while in your mouth. Once the material cools, the tooth should stay securely in place!
✔️ LOOK FLAWLESS - Achieve the smile of your dreams with the American Smile Tooth Replacement Kit.
✔️ HIGH QUALITY - This product is trusted by Dentists Worldwide.
✔️ SAVE MONEY - Dental work is incredibly expensive
✔️ YOU DESERVE THIS - You deserve to look your best!
✔️ IMPRESS YOUR FRIENDS AND FAMILY - They will not recognize you with this life changing device.
✔️ MEDICAL GRADE - Safe and comfortable to keep in your mouth all day long.
✔️ LONG LASTING - American Smile Tooth Replacement Kit is crafted from high quality materials that will not need to be frequently replaced.
✔️ FREE DELIVERY - We won't charge you for standard delivery, we care about our customers and don't think you should have to pay for your product to be delivered.
✔️ GOOD MORALS - We are a company with great ethics, we treat and pay our staff fairly and give all of our customers our respect & appreciation. Deciding to go with us means you're supporting a small independent company with a heart of gold.
1. Select the Best Shade of Temporary Tooth
The Pro Series Temporary Tooth Replacement Kit comes with 5 strips of teeth, there are 5 shades total. Choose the shade that most closely matches your natural tooth shade. In front of a mirror, hold a row of teeth next to your real teeth and find the tooth that will best fill the space of your missing tooth.
2. Cut Out Your New Tooth
Once you have selected the best tooth, cut out the selected tooth with a pair of scissors. Once removed from the strip, you can file and trim the tooth to the desired shape and size to fit in the space of your missing tooth.
3. Heat the Fitting Material
Heat a cup of water until it is boiling, the water will need to be very hot. Take about 10-15 white fitting beads (approx 1/3 of the bag) and drop them into the water. After about a minute, the beads should turn clear. Once the beads are clear, scoop them out of the water with a metal spoon. The working time of the fitting material is about 2 minutes.
4. Apply the Fitting Material to the Tooth
Take the clear fitting beads and roll them into the shape of a ball. Apply the softened fitting material onto the back side of the plastic tooth (make sure the back of the tooth is dry). The beads should stick to the plastic. If they do not stick, you may need to the heat the fitting material again. Try to keep the fitting material from getting on the front side of the tooth. Scrape any soft fitting material off the front of the tooth with your fingernail.
5. Fitting the Tooth
While the fitting material is clear and soft, insert the tooth into the space of your missing tooth. Hold the tooth in the correct position. Once the tooth is in the correct position, gently squeeze on the tooth so that the fitting material is pressed behind your surrounding teeth. With your thumb, press the softened material up and around the back sides of your adjacent teeth until it stays in place on its own. (If you are new to the fitting process, it may take a few tires until you are comfortable with the fit.)
6. Let them Cool
Once the fitting material is spread behind your natural teeth and it feels like you have a secure fit, let the tooth cool in place. It should only take a few minutes to cool and harden while in your mouth. Once the material cools, the tooth should stay securely in place!
It feels like you can go out into a crowd and be able to be yourself, and talk, and not be so self conscious of not having your teeth. It really has given me a lot more confidence being able to smile and have nice teeth.
Lori W
New Orleans
I've always wanted to have a really great smile. I have friends that have really great smiles and you see them and you wish you had that perfect smile but the cost of veneers is just way more than I can afford. The American Smile is extremely affordable and it's a really quick great option for a perfect smile. I love my smile!
Jackie L
New York
I feel like people take me more seriously now that I have nice teeth. Really it does make a difference. And I feel since having my new tooth, I am not afraid to stick my hand out and meet someone or just talk to a total stranger. It makes me feel really good and confident. That's the key word: confidence.👍
Jamie S
Chicago
We truly believe we make some of the most innovative products in the world!
You may receive a refund for your new American Smile, provided it is unopened and in its original packaging within 30 days of receiving the order. Once the package is opened it cannot be returned.
We have 24/7/365 Ticket and Email Support. Please contact us if you need assistance.